It’s almost the end of the year, and hopefully you have allowed time this month to do some reflecting. I’ve written about goal planning a bit too much, and a little about vision board creating over these past few weeks.
My friend Jaime asked me about my vision board process this week, and I remembered that I should probably share with you all how it works as well:
HOW TO CREATE A VISION BOARD
- Find 3 hours of alone time.
- Get 3-4 large pieces of white paper.
- Collect the magazines you received over the year. If you don’t get magazines in the mail, first off, why? Who are you? Secondly, then if you are in Texas, go to the local Half Price Books (quite possibly my favorite place on earth) and go to their magazine section. Buy several of the first ones that you find interesting.
- Go home. Get your scissors. Start cutting.
- Don’t think much before you begin. Just cut. This will take a few hours.
- Then, look at what you cut out. What are the similarities? Start gluing or taping the cut outs on to the white paper.
- Now, set your intention. Use the common themes from your completed vision board to set what it is that you need out of the next year.
- Note: Step #7 might take a bit. I didn’t come to the realization about my 2019 vision boards for a few weeks. So come back to it and keep looking at it – see what stands out today versus what stands out next week.
I have created vision boards and participated in this process for decades. As a teenager, and young adult, and now mid-aged adult, I have completed one, almost every year.
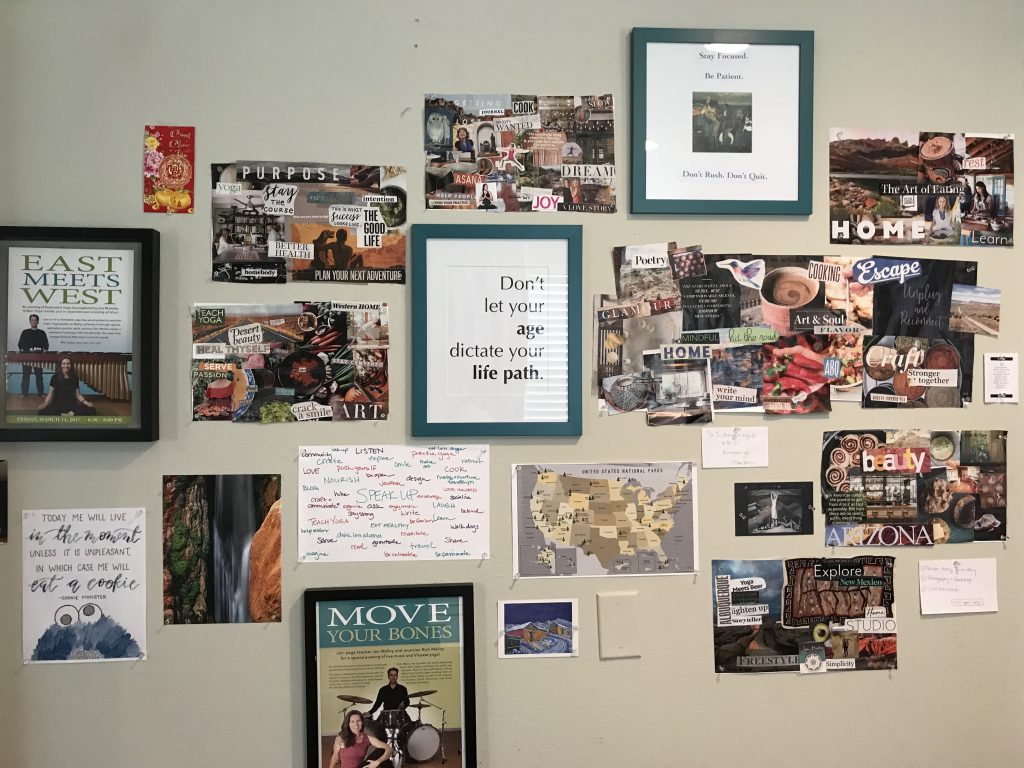
My parents came over last weekend and I showed them my new office. In my office is my vision board wall (pic below), where I have several of the past years’ worth of boards hanging. They both looked at me and said: “We remember you doing this as a kid! We didn’t know you still did this!”
That was pretty cool. I almost forgot that I’ve done this process my whole life. This is one of the things I have always been interested in. When people say: what were you interested in as a kid? Remember your roots. Move more towards that now that you are an adult.
This is that. 🙂 Thanks to my mom and dad for helping me remember.
What’s interesting, something that it took me a little time to realize, is that none of it included yoga.
None of it.
As much as I have been into yoga these past several years, I am curious if this means a shift is happening. I feel it happening, I’ve just been pushing those feelings away. Now it’s staring at me in the face, literally.
Where to go with this, I don’t yet know. I do find it interesting, and is something that I’ll be spending more time with, for sure.

This will be my last recipe before Christmas. I hope you all have a fabulous time and get to share the holiday with friends and family!
With love, Jen

Sugar Cookie Vision Boards
Ingredients
For the cookies
- 2 tbsp. flax seeds, ground
- 1 and 1/2 c. vegan butter, chilled
- 1 c. natural cane sugar
- 4 c. all-purpose flour
- 2 tsp. baking powder
- 1/2 tsp. salt
- 3 tbsp. almond milk
For the icing
- 3/4 c. vegan butter
- 3 c. powdered sugar
- 2 tsp. vanilla extract
- 1 tsp. almond milk
- sprinkles or toppings of choice
Instructions
For the cookies
- Combine the flax and 6 tbsp. warm water in a small bowl, whisk, and set aside for a few minutes.
- In a large bowl, beat the butter and sugar until fluffy. Add the flax, and beat until combined.
- In a small bowl, combine the flour, baking powder, and salt. Slowly add the flour mixture to the sugar mixture, adding in the milk bit by bit to help everything combine.
- Place the batter on a large piece of parchment paper, and fold the paper over the batter. Press the paper down so the batter gets to about 3/4" to 1" thickness, and then put in the fridge for 20-30 minutes.
- Heat your oven to 350 degrees.
- Begin rolling out the dough to about 1/4" thickness and cut it to your desired shapes.
- Place the cookies on your cookie sheet, and bake, 13-15 minutes, until lightly browned.
- Cool completely - for at least an hour.
For the icing
- In a medium bowl, beat the sugar and butter together, little by little, adding in the vanilla and almond milk throughout the process to help the icing stay smooth.
- Spread the icing on the cooled cookies, and top with sprinkles, if desired.
- In order to harden the icing, leave the cookies out for 6-8 hours. Enjoy!
